
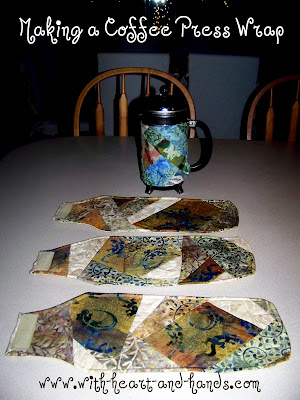
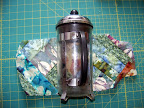
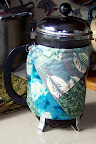
I love to use small pieces of leftover fabric to make small quilted projects. One of my absolute favorites has been this coffee press wrap or jacket. It's been such a hit among family members that I am now including it on my 'must make' guest list for anyone who loves pressed coffee and needs a little 'quilt' for their pot! And in fact, while so many other projects were 'percolating', I will be making myself a brand new one...later, today ..as well!
Making these from scraps bits and pieces is fast,fast, it's frugal and it can be made and given away that day as a quick hostess or holiday gift;) This one only took me a few hours to make, even with the crazy piecing and it works extremely well to keep our french press coffee nice and warm to the last drop. But use a simpler style out of one piece of fabric and it's done in less than half an hour!
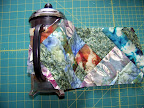
It is so easy, and so much fun, that our little french press is actually on its third wrap. I like to change it's little 'coat' along with the seasons! So, today, I'm making one to match my winter counter top table runner, and coffee pot mat.
Here are some easy instructions, using my first little model and it's still the process I use now. I've made at least 10 of these and I never tire of the process, or how cute they are by the end!
Free Tutorial: Making a Coffee Press Wrap
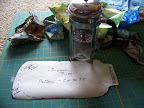
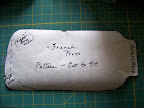
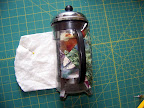
1.Collecting small leftover scraps from previous projects (wedding pillows 1 and 2) I used them with a simple pattern designed by simply wrapping and drawing lines on a piece of paper to fit our coffee press. Looking somewhat like the shape of a hot water bottle (how appropriate!) It includes a lipped section....to create the wrap over effect and for application of a velcro tab, later.

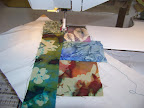

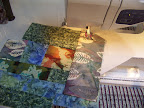
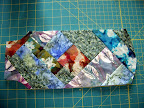
2. Using a base fabric as foundation, I then began to piece small sections of my scraps into crazy quilt like arrangements. Seam a section, flip and turn, add another and so on.
3. Be sure to press as you go long
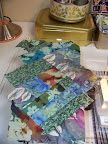

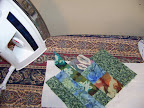
4. And continue until your pieced section is large enough to completely cover the pattern you have sized.... with enough to trim off neatly around the pattern edges.
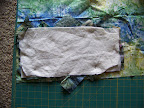
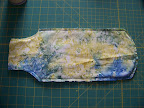
5. Now, cut a back section and a piece of inner batting section (using the same original pattern) and trim all to a matching size.
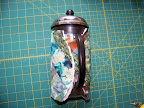
6. During this process, you will wrap your pieced section around your own french press to get accurate sizing....and to make sure that it fits correctly around the coffee press handle section.
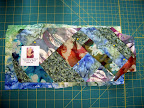
7. Now, sized to fit, you can add a label... or any decorative trim to your piece.

8. Sew right sides together, with batt on top of one of those sides.
Trim and turn. Fold tab's raw edges in to catch as you sew on velcro.

9. Add velcro on one side of the tab, fit to the press for placement of the other velcro section on opposite side and sew on.
10. If you want to add some decorative quilting, you can do that as well.

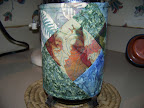
And voila! A nice, quilted, warm french coffee press wrap...to give or to keep...it's a wonderful project created entirely from free leftover scraps!
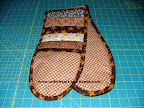
Add some 'kitchen quilts' often known as potholders or hotpads, a mitt to hang over your oven door handle...and you've got a matching set for a super nice gift..even for yourself!
And for other fun ideas:
Kitchen Quilts aka potholders, mitts, wraps of all kinds!


Michele Bilyeu blogs With Heart and Hands as she shares a quilting journey through her life in Salem, Oregon and Douglas, Alaska. Sharing thousands of links to Free Quilt and Quilt Block Patterns and encouraging others to join in the Liberated Quilting Challenge and make or donate small art quilts to the Alzheimer's Art Quilt Initiative (AAQI) Help us change the world, one little quilt at a time!
3 comments:
Some good ideas there Michele. Clever you!
love this simple yet so creative wrap! thanks so much for sharing the process..
My sis in law has one of these coffee makers. Thanks for the cute idea! Now I just need to make it by Christmas. So cute. Thanks!
Post a Comment