

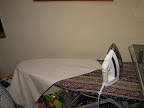
1. Iron white or off-white fabric (muslin or cotton) until smooth
2. Iron freezer paper, shiny side to wrong side of fabric. The ironing melts the shiny wax coating and adheres it to the fabric.
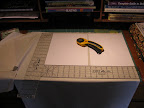
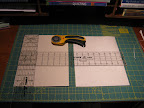
3. Cut freezer paper-fabric to size, using an 8.5" x 11" piece of paper as guide
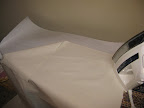
4. Two completed sheets of adhered freezer paper backed muslin ready for printing
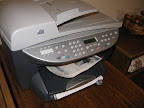
5. Printer needs to be set to best or good quality ink level, then simply allow the freezer paper-fabric to feed through printing process of photos. I printed 4 photos off on one sheet of the paper-fabric, and my quilting labels off on the second sheet.
6. Completed set of photos, cut down to size needed for patchworking into a pillow. Peel off the paper backing as shown below before sewing. Although, I actually prefer to sew through the paper with my block seams and peel the backing paper off later for easier sewing with the very thin photo-fabric pieces.
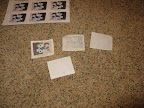
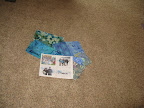
7. My 'Quilting Journey' angel labels, with paper being peeled off
note:
I've used this technique many times and love the natural, somewhat faded look that I end up with. Compared to purchased photo transfer sheets (which end up with a plastic like top finish) or purchased fabric printer sheets (which are expensive) these are practically free and easy to make and use.
I use a pressing cloth to heat set the photos along the way and then heat set again on the finished project. I have even experimented with hand washing and had them survive. I wouldn't ever recommend washing any finished project using these, however!
If you want to insure washability, check out the variety of products available for pre-treating fabric. There are products like Bubble Jet Set to soak fabric in before printing and others like Bubble Jet Rinse or Set that can increase the chances of washability and decrease potential fading.


Trouble Shooting Tips:
1. It is absolutely crucial that the raw edges be totally ironed to the fabric, or even extra glue stick or taped down for smooth printing.
2. The other thing to try is to double check and alter your paper settings if you get paper jams.
Depending on your own personal printer, this might be listed under 'printer properties' and then 'paper settings'. Make sure it is set to specialty papers or photo transfer papers...something special and thicker! With my computer/printer..the clicking order of commands is: control panel, printers and faxes, properties, set printer properties, general/set printer preferences, type is (box below size is)...switch to automatic and if that is not working select one of the others...say note card or photo transfer paper
3. Make sure to iron the transferred image REALLY well with a hot but not burning iron to set it! This does not make a permanently washable transfer but it makes an awfully good one and at almost no cost to you! For more a really good more permanent solution, if you do worry about that, use a simple clear sealer (spray outside and hold your breath ;) on labels or prints. It won't show if you use matte form, barely shows with glossy and is washable.
I've used this technique dozens and dozens of times, and almost all of the time it is flawless. Just get those settings to co-operate, adhere those edges (you can even tape the edges like a fold over seam if need be) and make sure to iron the transferred image REALLY well with a hot but not burning iron to set it! This does not make a permanently washable transfer but it makes an awfully good one and at almost no cost to you!
Other color setting options: (shown below, clear acrylic permanent spray on top)
 | ||
| From freezer paper photo transfer BubbleJet Set Instructions
|

Inkjet Printing on fabric recommendations and age print comparison
Some of the places you can buy the recommended fabrics:
Morsbags: use same technique as explained above to make your own fabric labels and simply print them off of your inkjet (NOT laser...gets too hot) printer
8 comments:
Have a wonderful time in Alaska and give your parents a hug from your blogging friend. (Me) I like your tutorial for printing on fabric. The pillow is lovely and the couple will be thrilled I'm sure!
How long will you be in Alaska? Take more pictures! (Or is it mostly night up there now?)
Your blog needs to be catalouged, there is always so much cool stuff here! I gave you an award on my blog today! Come visit!
Thank you for the tutorial. When my new printer gets here by the end of the week, I'll have to play. I love the wedding gift pillow.
I've always wondered how this was done. Who needs Google search when we have Michele :)
This looks great! I'm definitely going to have to do this. I was thinking of trying my hand of using fusible applique to make a person. I can just see using a photo transfer photograph and putting it behind the applique with a frame, so people can compare. I guess that would depend on how well my copy followed the original!
Thanks for the tutorial! This is really a great idea...
Help! I've been following the instructions you've so kindly provided and I'm running into problems. The first sheet printed out great. All my other attempts with the same fabric keep jamming in the printer. Any advise?
Joan
Thanks for the clear directions. I am so ready to try this technique. Your directions are clear and I am starting. Again, thanks.
Post a Comment